Vientiane (Day 119): Explosive Remnants of War and Finding Dory

June 27, 2016

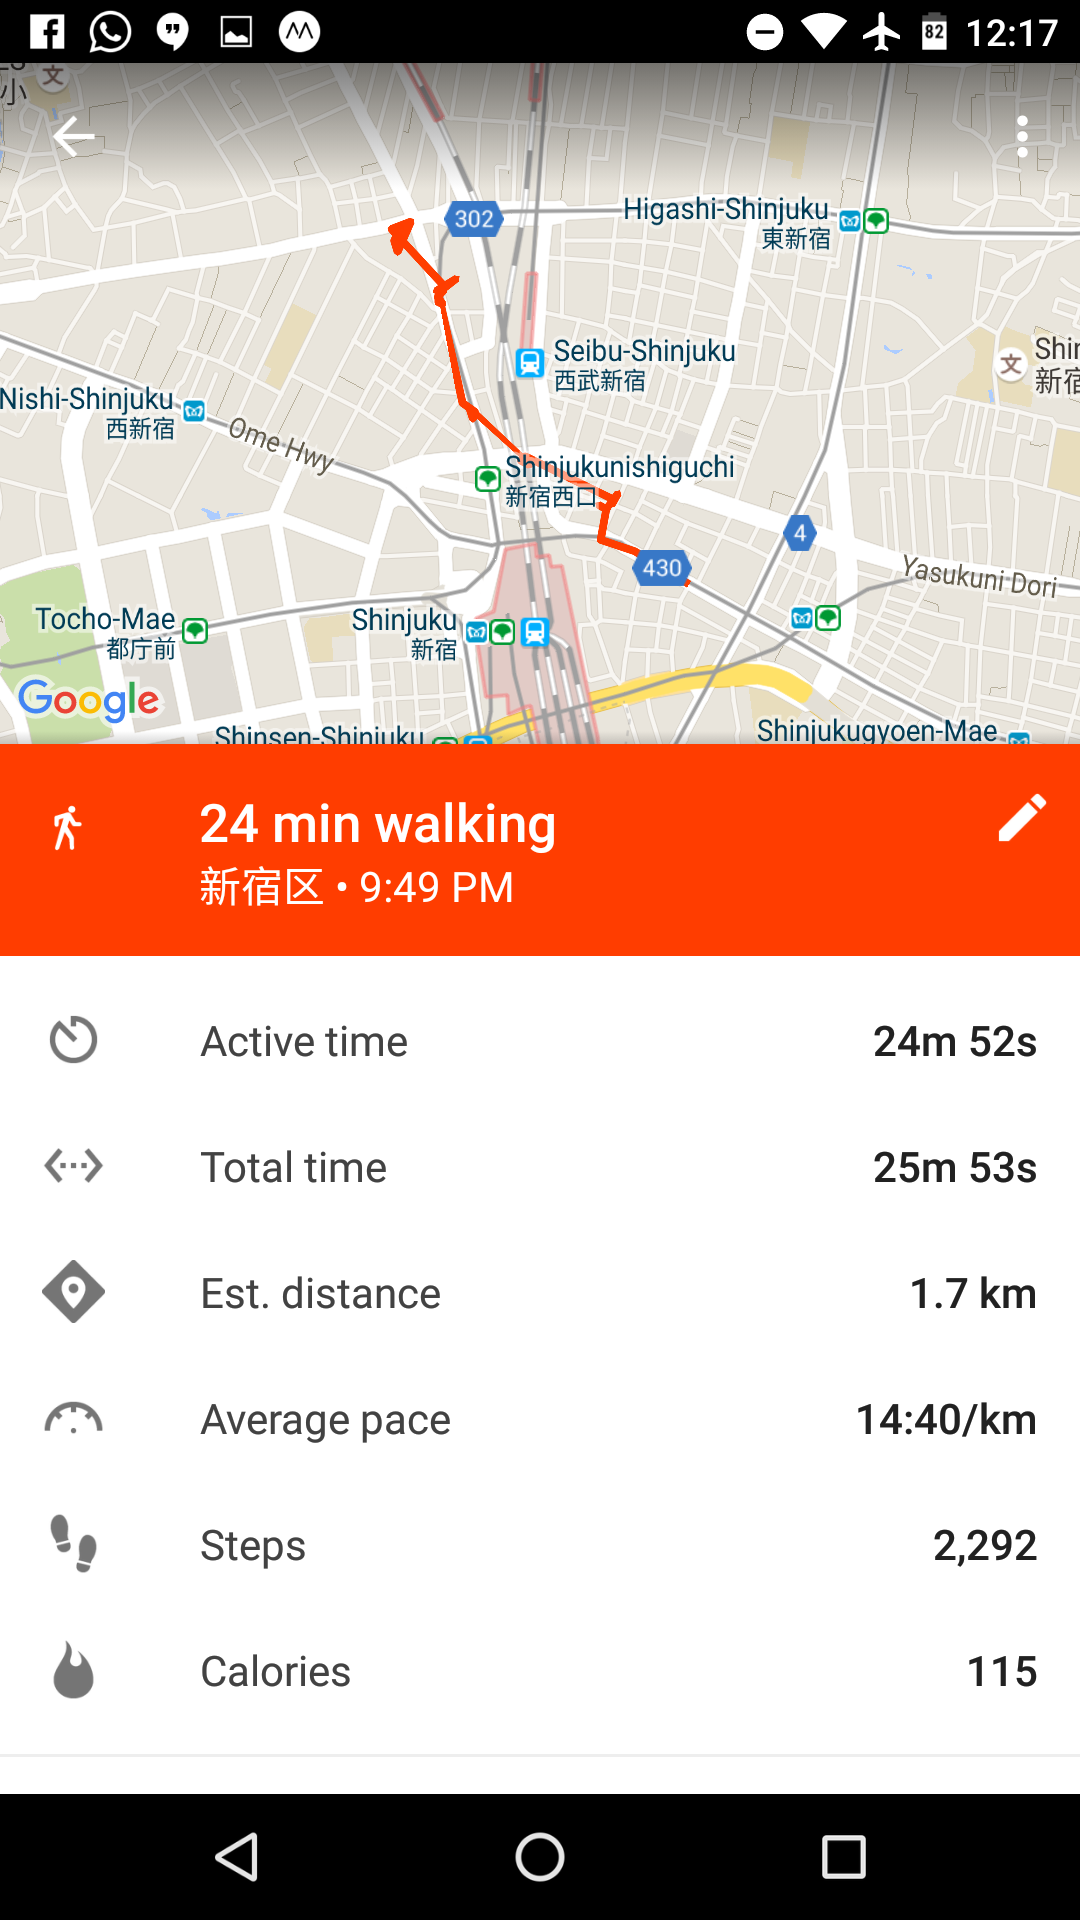
Today was our only full day in Vientiane, and we got off to a late start after spending the morning doing some trip planning with the mostly reliable internet at the hotel. There was one particular site I wanted to see in Vientiane, called the COPE Visitor Center, which was about a 20 minute walk from our hotel. We didn’t have any other plans for the day, so we started our day heading in that direction.

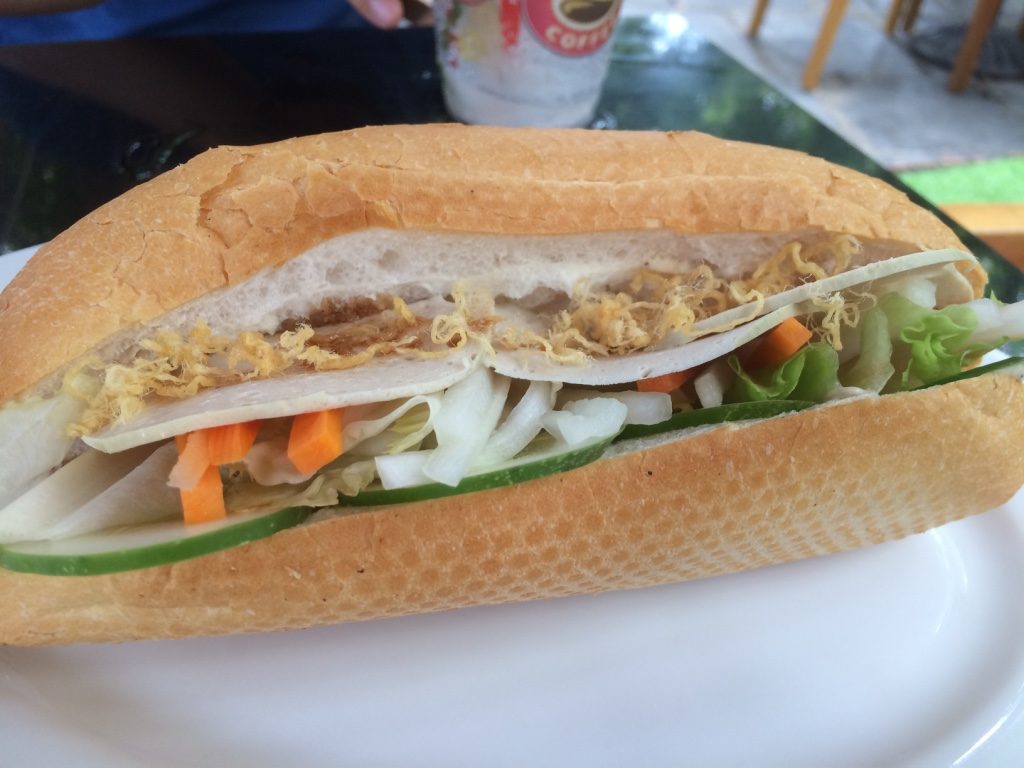
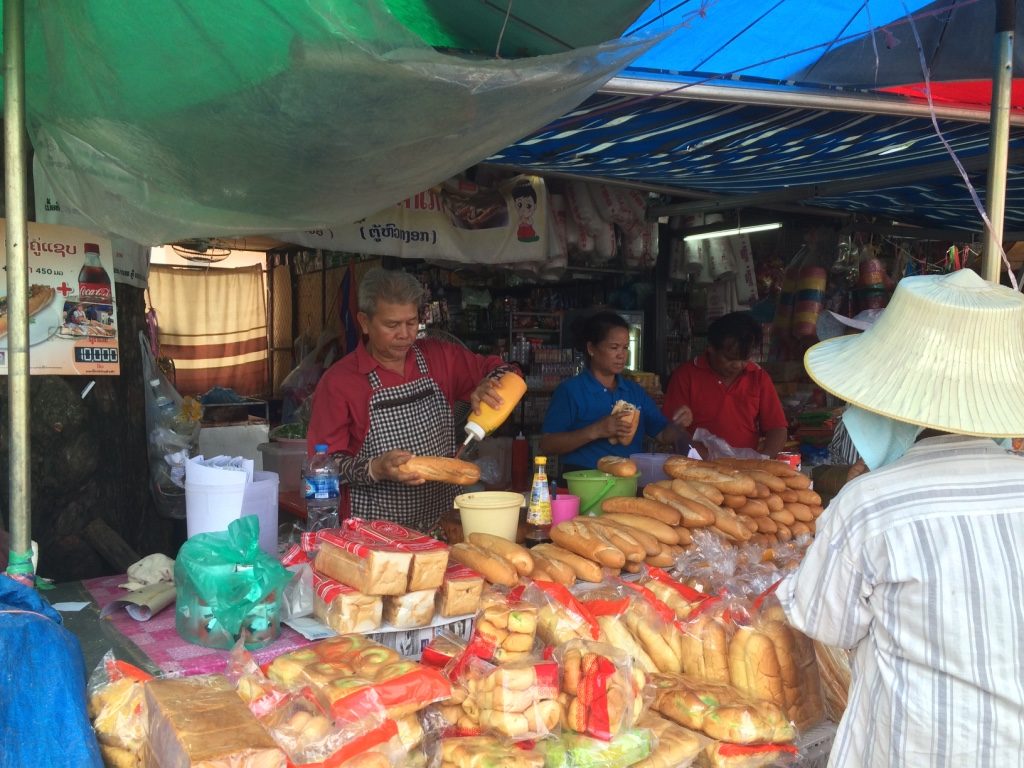
For lunch, we stopped by a sandwich stand which we had read online. They’re supposed to be known for their bread and pate, so we ordered two “Pork and Pate” sandwiches. It was just a stand with no particular place to sit and eat. We crossed the street to a convenience store so we could buy a drink and we ended up eating on the sidewalk.

The baguette and pate stand in Vientiane
The older lady making our sandwiches

The sandwiches themselves weren’t quite what we expected. I couldn’t taste much pate but I still really enjoyed it. The baguettes are different in Laos compared to the ones in Vietnam. They’re longer and narrower, and the outside of the break isn’t as stiff and crisp (Kait: they’re more like actual French baguettes). The sandwich were also a lot saucier than the banh mis we had in Vietnam.

Inside the Lao "banh mi"
Inside the Lao “banh mi” (each half, 6 inches or so, was 10,000 LAK = $1.60 CAD)
On the walk to COPE, we passed by this sandwich stand that charged 10,000 LAK for a full baguette and a drink! So cheap.. but also not as sanitary looking at our stand.

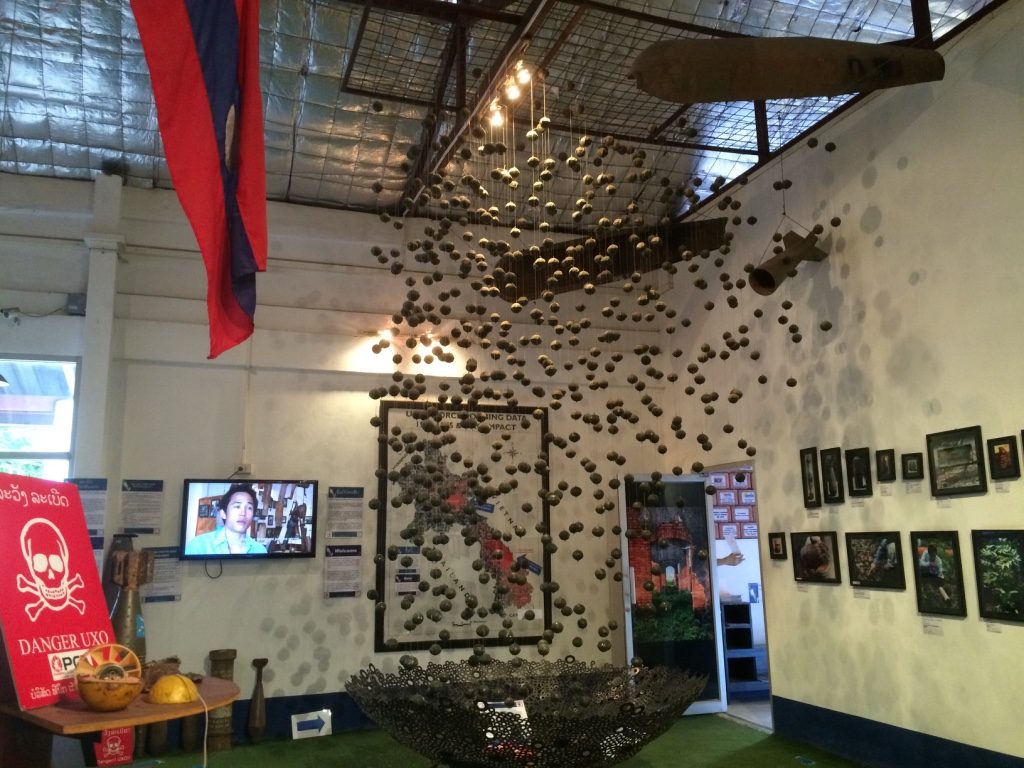
COPE stands for Co-operative Orthotic & Prosthetic Enterprise, and they are the main source of artificial limbs, walking aids, and wheelchairs in Laos. The visitor center was located at COPE’s National Rehabilitation Center. Why are artificial limbs significant to Laos and why was the visitor center the only place I really wanted to visit in Vientiane? Well, Laos has the not so great distinction of being the most heavily bombed country in the world. During the Vietnam War, the United States dropped more bombs in Laos than all the bombs dropped on Europe during WWII. Over 260-270 million cluster bombs were dropped and approximately one third of those failed to explode. So Laos is littered with Unexploded Ordnances (or UXOs) which to this day continue to maim and kill people every year.

COPE’s visitor center covers some of the history of bombing in Laos along with information about the current efforts to clear UXOs across the country. There’s also a lot of information regarding COPE’s work with providing artificial limbs and providing rehabilitation and physiotherapy to those disabled.

COPE Visitor Centre in Vientiane
COPE Visitor Center in Vientiane
A display of "bombies"
A display of “bombies”
They had prosthetic legs that people made themselves before coming to COPE for proper prosthetics

For me, the main reason I wanted to go was because I saw it as an opportunity to learn a bit more about some history in Laos, and also see how that history continues to impact the country today. That history is the reason Laos needs organizations like COPE. However, it was interesting for me to see that they also provide artificial limbs and rehabilitation services to people disabled through other means. One display noted that more and more people are wearing helmets on their motorbikes in Laos now, so more people are surviving accidents with disabilities (rather than dying had they not worn a helmet).

(Kait: We watched a 45 minute documentary about an Australian man who moved to Laos to help train and disarm bombs all over the country. I admire people who risk their lives each day to help a country that isn’t theirs. It was also heartbreaking to see the kids in the documentary who find these bombs while playing in the countryside. It was also frustrating to hear them speak about how much money they could get for the metal. They seemed relieved that bombs were being removed from their village but at the same time they were upset that they couldn’t sell the metal for 1,000 kip, which is less than 20 cents! I’m glad that Laos is receiving more funding from the American government to help get rid of all the bombs they dropped over 30 years ago. Like the documentary said, it’s basically a race against time to try to remove them before little kids and villagers accidentally find them. I was also shocked at the sheer volume of bombs that were dropped. Imagine bombs being dropped over and around you every 8 minutes for 24 hours a day, for 9 years.)

After the COPE Visitor Center, we went to a nearby mall and found a movie theatre. We checked the times and decided we would come back to catch a 7:10 showing of “Finding Dory” after we grabbed a bite to eat. We made our way to the river front near the night market we visited yesterday. We settled on a street food stall that had a spicy duck dish (Kait: it’s duck larb) we wanted to try. We got that and a Pad Thai (which seemed pretty common in Vientiane). The spicy duck larb was a bit spicier than we expected so we had to go through a smoothie and two drinks from the convenience store nearby to keep mouths from burning up.

On our walk from Vientiane Center to dinner we came across tons of vendors set up along the banks of the Mekong River.
On our walk from Vientiane Center to dinner we came across a lot of vegetable vendors set up along the banks of the Mekong River. We’re not sure what the vegetables are on the far left.
Across the river to the left is Thailand! This isn't a very good picture of showing that.
Across the river to the left is Thailand! This isn’t a very good picture of showing that.
The best mango smoothie. We tried to go again later that night but they were closed!
The best mango smoothie (10,000 LAK = $1.60 CAD). We tried to go again later that night but they were closed!
Duck larb (18,000 LAK = $2.85 CAD)
Chicken pad thai (15,000 LAK = $2.38 CAD)
At the theatre waiting to watch Finding Dory

After dinner, we made our way back to the mall and ended our day watching Finding Dory. It turned out to really fit our day as I thought Finding Dory was about living with a disability. Looking back on our day, it was easy to think about how fortunate we were… to be born and raised in Canada (where we don’t have to worry about UXOs), to have our health (both physically and mentally), and just to be doing what we’re doing. It was a good reminder how lucky we’ve been and not to take things for granted.
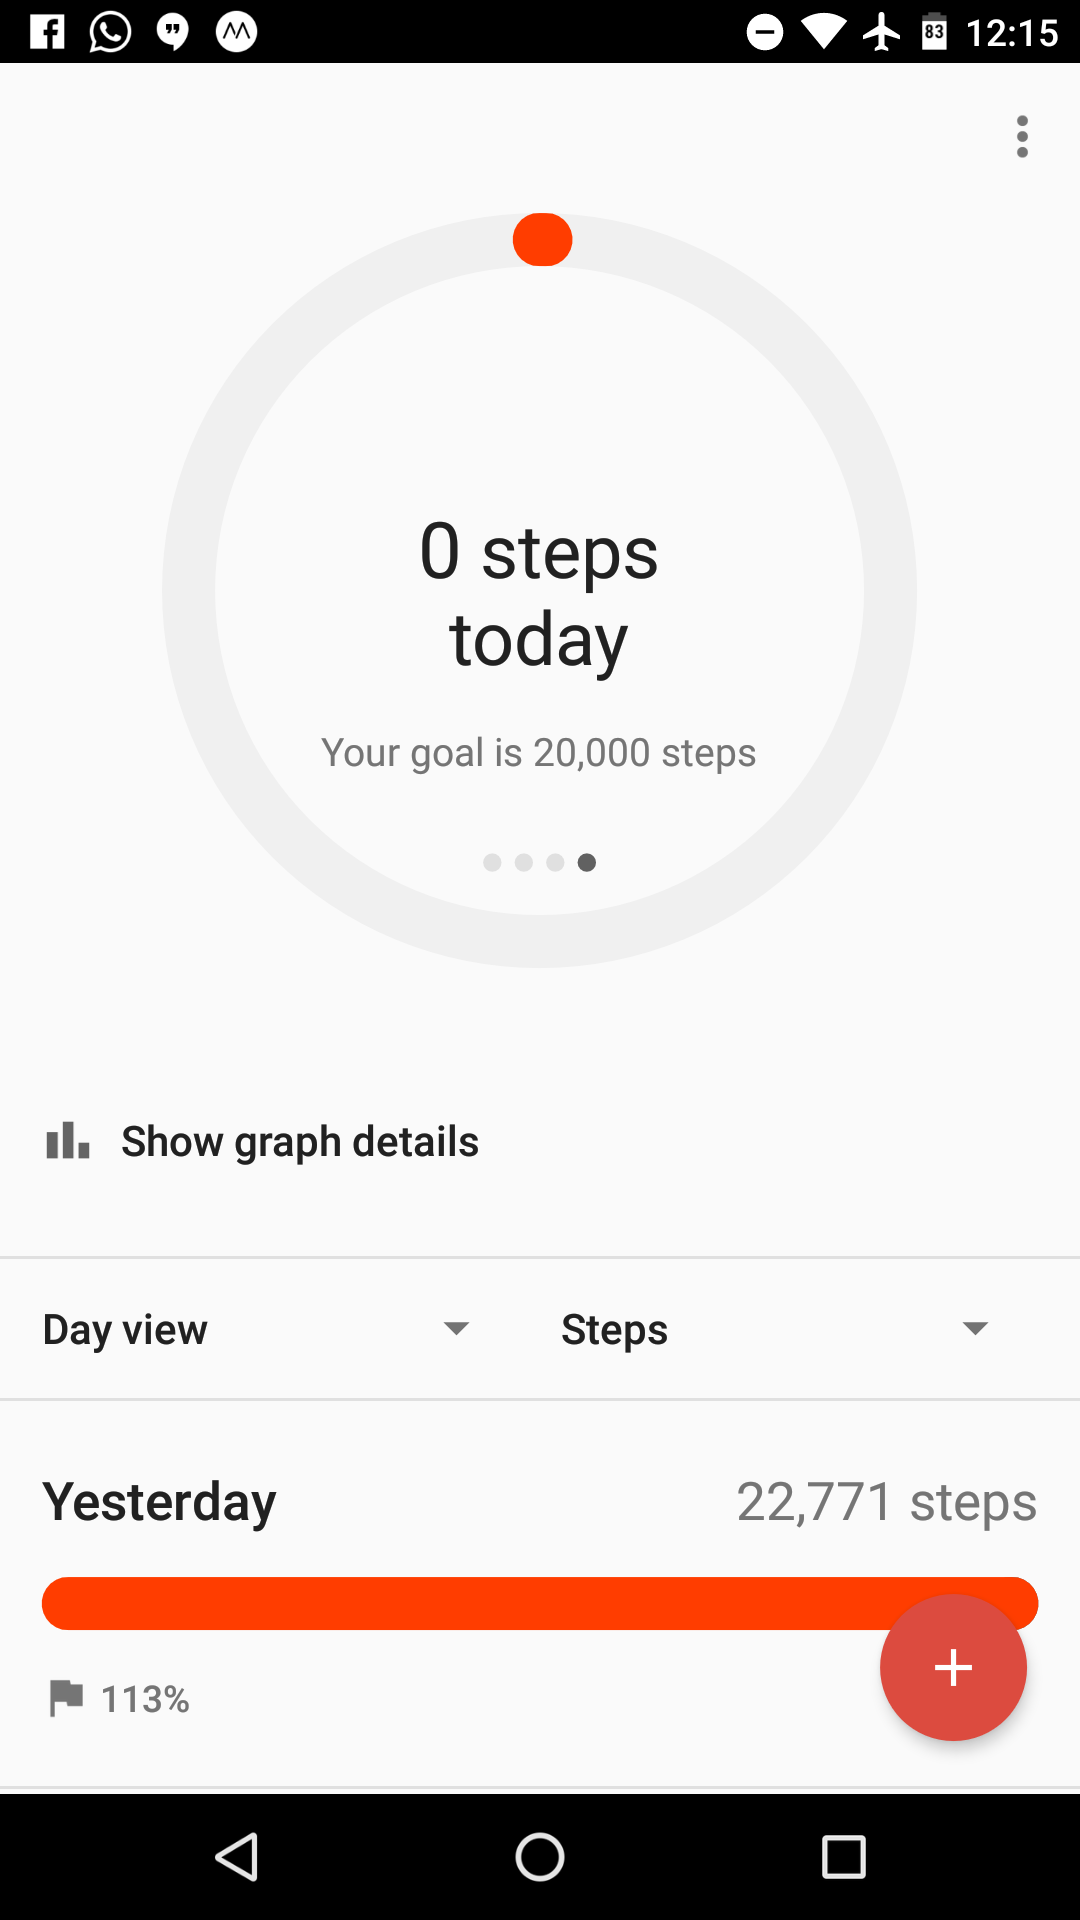
Steps Today: 17,000

Hanoi (Day 111): Ho Chi Minh in Hanoi

June 19, 2016

This morning, after breakfast at the hotel, Kait and I made our way to the Ho Chi Minh Mausoleum at Ba Dinh Square, which was located on the western edge of the old town in Hanoi. This was one of those sites where, while I didn’t have any particular urge to see, it felt like something that needed to be checked off a list.

It was a sunny morning and the temperature was around 33 degrees. It wasn’t even close to the hottest day we’ve experienced in Vietnam, but for some reason, the heat really hit us while we walked to the Mausoleum. By the time we arrived, we were both dripping with sweat. It didn’t help that when we reached what I thought was the Mausoleum, we had to walk around the fenced off square all the way to the other side of it in order to get into a line up for the Mausoleum. The lineup stretched for some distance, but moved relatively quickly (Kait: I didn’t think we were going to make it in before it closed at 11am, but we did!). We had to pass through security and they had bag checks (for water bottles) and a separate drop off point for camera gear as no cameras were allowed in the Mausoleum.

The crazy line up before it became an orderly line
Line has become more orderly

After moving through the line and finally reaching the Mausoleum, we were led in in two single file lines (Kait: when the line splits into two, go to the left side. You’re closer to HCMC’s body and have better views). They keep the line moving (which is good for everyone waiting), but it really doesn’t leave you with much time to view Ho Chi Minh’s embalmed body. After walking through the Mausoleum, we walked across the square to visit the Ho Chi Minh Museum. Now, I didn’t know a lot of details about Ho Chi Minh’s life, and after going through the Museum, I felt like I still didn’t know much. The museum had a couple exhibitions about Ho Chi Minh’s journeys around the world before returning to Vietnam to aid in their revolution. It also had a hodge podge of displays in the top floor about communism and Ho Chi Minh’s life. None of it felt very cohesive, and I felt like I came away from it without a good grasp of the person (other than the fact that he travelled extensively). (Kait: When reading some of the plaques at the museum, the descriptions were pretty questionable. Ie: Vietnam is described as a “Democratic Republic State”. Either my understanding of what democratic is, is totally wrong or Communists like to make their citizens believe they’re a democratic country)

Outside the Ho Chi Mausoleum
Outside the Ho Chi Mausoleum. Staff is rolling up the red carpet for the day.
Ho Chi Minh Museum
Ho Chi Minh Museum
This is an example of how random the museum seemed

It’s interesting to me how the Communist Party of Vietnam has built a personality cult around Ho Chi Minh… not unlike Kim Il Sung in North Korea and Mao Zedong in China. It makes me wonder if they knew how they would be used post mortem, and how it’s possible their legacies are not what they wanted. Even with the Mausoleum, I read that according to his will, Ho Chi Minh wanted to be cremated. Makes me wonder how he might be used now in ways he never would have wanted… But I guess he’s dead now so ultimately, it’s not his concern.

After a Ho Chi Minh filled morning, we slowly made our way back to our hotel, stopping at a Highlands Coffee (Kait: The Starbucks of Vietnam) to grab a drink and sandwich. Highlands Coffee is a chain that seems to always have locations with large patios adjacent to parks or museums. Kait had a Green Tea Frappuccino (which she said wasn’t really a Frappuccino, Kait: it was more of an iced drink with jello) and I had a frozen lemonade.

Green Tea "Frappe" (49,000 VND = $2.83 CAD) and Lime slushy (39,000 VND = $2.25 CAD)
Green Tea “Frappe” (49,000 VND = $2.83 CAD) and Lime slushy (39,000 VND = $2.25 CAD)
Kait's lunch for today. Highland's banh mi. It was okay, nothing special. It was cheap for a clean coffee shop (19,000 VND = $1.10 CAD)
Kait’s lunch for today. Highland’s banh mi. She said it was okay, nothing special. It was cheap for a clean coffee shop (19,000 VND = $1.10 CAD)

As we’ve done the last couple days, we spent the early afternoon back in the comforts of our hotel, hiding from the worst of the heat outside. We continued to look at booking things over the next couple weeks, and it really hit me we’re nearing the end of this leg of our travels. With less than a month to go, there’s still a lot we want to see in South East Asia.

After a lazy afternoon, we made our way out for dinner just across the street from our hotel. It was a Bun Cha (Kait: Bourdain took Obama to eat bun cha when he was in Hanoi, just not at this place) restaurant that seemed to have some decent reviews online (Kait: it’s apparently “the best” bun cha in Hanoi…). They had large prominent signs in English pointing out that the location beside them was “Fake” and they are the real restaurant. While I have no doubt they might have been at that location serving Bun Cha for longer than the place next to them, calling them fake seemed pretty harsh. I’m sure the place next door serves real food.

Bun Cha Dac Kim
Bun Cha Dac Kim
The signage at the restaurant saying next door is "fake". These signs were everywhere.
The signage at the restaurant saying next door is “fake”. These signs were everywhere.

The Bun Cha itself was decent, but nothing to write home about (though I guess that’s exactly what I’m doing right now…). We only ordered 1 to share (90,000VND = $5.20 CAD) and it was more than enough food for the both of us. It was similar to the Bun Cha we had in Hoi An, but came with an additional soupy broth/dip as well as pork belly slices cooked with the pork patties. (Kait: this was a more “real” version. The one in Hoi An was much tidier and well put together)

One order of bun cha and spring rolls (90,000 VND = $5.20 CAD)
Tim paying for our dinner. There's 5 levels to this restaurant.
Tim paying for our dinner. There’s 5 levels to this restaurant.

After dinner, we swung by a convenience store to grab some drinks and snacks that we’ll bring with us when we go on our cruise around Halong Bay starting tomorrow. Our first few days in Hanoi really flew by and I’m glad we kept a leisurely pace. We haven’t been hitting our 20,000 step goals consistently lately, but to be fair, the climate makes 20,000 steps a lot more difficult.

And Happy Father’s Day to our Dads and to all Dads out there! It’s also Father’s Day here, although I don’t think they make a big deal out of it. But we did see a sign that said “FatHers Day”.

Steps Today: 14,000

Spending Summary: New Zealand

During our month down under, Kait and I got to spend 7 days in New Zealand with my sister and her husband. Cost wise, we were expecting it to be similar to Australia, with the added advantage of splitting certain costs with another couple. Let’s see how we did.

  • Accommodations: $140.84
  • Food: $357.11
  • Transportation: $361.84
  • Activities: $253.04
  • Souvenirs: $103.56

We spent a total of $1,216.38 (CAD) over 7 days in New Zealand. It was a short excursion so there isn’t too much to discuss, but let’s see how it stacks up to all the other countries we’d been to so far in terms of cost per day.

New Zealand Spending

Accommodations

So, the first thing to note here is that our accommodation costs for New Zealand were very low thanks to two things. First, my sister and brother-in-law had friends in Auckland and Wellington that hosted us while we were in those cities. Second, of the 2 nights that we did stay in hotels on the road, the costs were split between 4 people. Of the 2 nights we stayed in hotels, the total cost was $281.67, or an average of $140.84 per room per night. This was slightly more than it was in Australia, but since Kait and I only had to pay for half of that, our total came out much lower.

Food

Food costs were also pretty much the same as Australia. Nothing too interesting about food costs.

Transportation

As with the other countries, transportation costs were split between intercity and intracity travel. For our New Zealand costs, you can basically look at it as a single item, because all our costs were car rental related. (I roughly divided gasoline costs to being either intercity or intracity).

The Toyota Highlander we rented for 7 days was $464.13, or $66.30/day. We drove 1,222.8 km and spent $158.85 on gas. Gas was around NZ$2/litre.

Souvenirs

This was my (and Kait’s) first time in New Zealand, so for me, I looked for banknotes and coins to collect. This worked out to be $103.56, which averages out to a pretty high per day amount because we only spent 7 days in New Zealand.

Activities

Between Auckland and Wellington, we spent time mostly enjoying the natural wonders of New Zealand. Most of that was free, but we did spend NZ$174 to explore the Waitomo Caves. The only other activities we did that cost money were the Polynesian Spa in Rotorua (NZ$54) and the Auckland War Memorial Museum (NZ$50).


As expected, the travel costs in New Zealand were right around the same ballpark as Australia. After Australia and New Zealand, we’d be spending the rest of our trip in South East Asia, so going forward, I expect our costs to drop significantly.

Spending Summary: Australia

So, clearly I’ve fallen (very) behind on these spending summaries, considering Kait and I are back in Vancouver now. I still think they might be useful for people considering trips to these locations though, so I plan to write one for each country that we visited.

We spent 23 nights in Australia, and we anticipated it would be the most expensive country we would travel through. Let’s see if that held true. (As with the other finance posts, all costs are given in Canadian Dollars unless otherwise specified).

  • Accommodations: $1,325.87
  • Food: $1,311.98
  • Transportation: $1,490.16*
  • Activities: $409.83
  • Souvenirs: $156.80
  • Telecommunications: $28.98

So, why the asterisks next to transportation? Well, that’s because I decided to exclude (a painful, $695AUD worth of) speeding tickets from that total. I’ll save the speeding tickets for their own “special” post. All I’ll say here is don’t go over the posted speed limits in Australia, ever. I’ve been driving for almost 16 years and by my estimates, driven around 300,000km. In that time, I’d accumulated a total of 3 speeding tickets costing me $600 (2 in Canada, 1 in the US). In 6 days of driving in Australia, for under 3,000km, I doubled my lifetime total number of tickets and more than doubled my total cost.

Okay, with that out of the way, let’s take a look at how the costs compared to the other countries we’d visited so far (average cost per day).

Australia Spending

Accommodations

We spent 23 nights in Australia, and although our average per night cost was only slightly higher than in Japan, we spent 12 nights staying with friends and family. So in actuality, when we paid for accommodations, the cost per night averaged $120.53. This far exceeds our accommodation costs in Japan, which averaged $76.79 when we weren’t hosted by family.

Sydney is an expensive place to live in. Real estate is increasingly unaffordable to the average household. It was actually somewhat interesting overhearing random bits of conversations around Sydney which sounded just like conversations you overhear in Vancouver about real estate. Interestingly though, or accommodation costs in Sydney were quite reasonable and we found a nice hotel for under $100/night. The small motels during our road trips, and accommodations at the resort city of Cairns, was what pushed up our average cost per night.

Food

No surprises here when it came to food costs in Australia. Prices are slightly higher than in Canada, but nothing is too outrageous. Even when the price seems high, it’s not so bad when you take into account tax is included (and there isn’t the same tipping culture in Australia as there is in North America). A small (i.e. small drink/fries) Big Mac meal was $9.85.

Transportation

Here’s where the costs get a little bit more interesting. Starting with the intracity spending, most of our costs here came from airport transfers and transit fares within cities. Sydney has a decent transit system in the city centre along with trains that go out into the suburbs. Melbourne has a large network of street cars which were nice but felt pretty dated compared to the large subway networks in Asia that we were used to.

Getting to and from the city centres in Melbourne and Sydney were also quite convenient. Melbourne Airport had a bus that runs frequently between the airport and Southern Cross station, along with free hotel transfer if your hotel is in the CBD. They advertise free WiFi on board but it didn’t work both times we took the bus. It’s $19AUD one way (no discount for return tickets). Sydney is even more convenient with the AirportLink train. It takes you from the airport to several different stops in the CBD, and you can use the Opal Card which will work on all the other city wide transit options. The exact fare depends on where you’re going, but it’ll be less than $19AUD.

Our intercity travel costs came exclusively from 2 domestic flights we took. We flew from Adelaide to Cairns on JetStar which cost $212.68/person, and we flew from Brisbane to Sydney on Tiger Air which cost $82.79/person.

The remainder of our travel costs came from the Car Rentals. I included all car related costs such as gas and parking here as well. We drove from Melbourne to Adelaide and from Cairns to Brisbane. Both rentals were from Hertz and the car rentals themselves worked out to be $67.61AUD/day. I was pretty happy with the costs of renting a car, but of course the speeding tickets kind of ruined the mood. (2 of the 3 tickets came from speeding cameras by mail, so we didn’t find out about those until later).

Souvenir

As with the other countries, I like to save coins and banknotes from the places I visit. Since I’d been to Australia before, there weren’t as many coins or banknotes I didn’t already have. It might interest you to know that Australia was actually the first country to introduce the modern polymer banknote in 1988. Canada followed suit in 2011, and actually contracts Note Printing Australia, a subsidiary of the Reserve Bank of Australia, to supply the polymer and security features of the new Canadian Banknotes.

Activities

The bulk of our activity costs came from a Great Barrier Reef tour while we were in Cairns. It was just under $200/person.

Telecom

My sister had a Cellular WiFi hotspot device which we activated while we were in Adelaide. Telstra was a pain to deal with though, and their pay as you go plans were difficult to understand. As much as I like to complain about Canadian Telcos (I’ve filed multiple complaints with the CCTS), I think Australia might be worse.

Miscellaneous

Not covered above is that Canadians (and pretty much everyone else I think) needs a Visa to enter Australia. You apply online for an “Electronic Travel Authority” and it gets linked to your passport. It costs $20AUD.


Our time in Australia was split with a week in New Zealand, which I’ll cover next. While it didn’t turn out to be more expensive than Japan on a per day basis, that was largely due to more of our accommodations being covered. Also, we spent a lot more on intercity travel while in Japan. If I were to compare two hypothetical trips to Tokyo and Osaka vs Sydney and Melbourne, I would guess that you would spend more in Australia.

(Originally Published August 8, 2016)

Sydney (Day 86): Walking Around the CBD

May 25, 2016

After 85 consecutive days, Kaitlyn is finally taking a break from writing our daily travel log, so I (Tim) will be filling in today. 85 days is quite an impressive streak… What does it take for such an amazing streak to be broken? Just the season premiere of the Bachelorette.

Our flight today to Sydney was at 12:15pm. Late enough that we didn’t have to rush in the morning, but not so late that we could do much in Brisbane before we had to leave (especially considering we normally sleep in). This was my first time here, and although we had less than 24 hours in Brisbane, it really left a good impression on me. I’d definitely want to spend more time in the city the next time we’re in Australia. (Kait: I agree. It’s usually skipped by most people but I think it’s a really nice city)

We checked out of the hotel just after 9:30 and drove the rental car to the airport to return. Of course, you always need to fill up the tank before returning a rental car. One interesting thing about Australian gas stations (or at least every single one that we’ve been to) is that they don’t have pay at the pump, and you don’t have to prepay either. The gas stations are all like the good old days in Canada where you use the pump first, then go into the station to pay. It’s also interesting to note that since Australia doesn’t have pennies anymore (like Canada), when you pay for gas with cash, you can always give yourself 2 extra cents of gasoline 🙂

We we’re flying Tigerair for the first time today and the check in and bag drop process were all automated. After using a kiosk to check in (like a lot of other airlines), you have to deal with dropping off checked luggage on your own as well. First you have to put the baggage tag on your bag, then proceed to the back drop stations where you scan your boarding pass. The bag drop station then automatically weighs your bag (to make sure it’s within the weight limit you paid for), scans the baggage tag, and sends your bag down the conveyor belt. It was a little bit cumbersome because you had to make sure your bag and the baggage tag was oriented in a way that allowed it to be scanned, but overall, the process was fairly quick and painless.

Domestic Terminal at Brisbane Int'l Airport. There's direct flights on AC to/from Vancouver (which are heavily advertised)
Domestic Terminal at Brisbane Int’l Airport. There’s direct flights on AC to/from Vancouver (which are heavily advertised)

We knew there wouldn’t be any food (or drinks) on the flight, so we both got meat pies from Pie Face at the food court in the terminal. (We also shared a sausage roll from a cafe). We’d been meaning to try Pie Face since we arrived in Australia, and now seemed as good a time as any. We also got two more Bundaberg sodas: Sarsparilla (Kait: it was more like a root beer) and a Lemon, Lime & Bitters. This trip has been the first time I’ve had Sarsparilla from companies other than HeySong. (We also tried a Malaysian brand while we were in Singapore). While I enjoyed experiencing the diversity of flavours in the different Sarsparillas, I still think HeySong is the best.

Pie Face (an Aussie pie chain)
Pie face ($5.95 AUD, a $1 more than outside the airport).
Bundaberg sodas (2 for $6 AUD)
See you soon, Brisbane
See you again, Brisbane

The flight was smooth and weather was good throughout the flight. As we approached Sydney, I could see out the window that there was a fairly large fire burning not far from the city. (Later in the day while we walked around, the air was hazy and we could smell the smoke.)

aerial photo

Getting into the city from the Airport was really simple with the train. We got transit cards (called Opal Cards in Sydney) and put 20 AUD on them. Unlike most cities with transit fare cards for tapping on and off, the Opal Cards did not require any cash deposit, so it was a no brainer to get them. From the domestic terminal at the airport, it cost 15.76 AUD and took 10 minutes to get to Central station. From the station, it was a short walk to the Central Station Hotel, our home in Sydney for the next 3 days.

Airport Link train
Airport Link train
Opal card
Opal card
Arriving at Sydney's Central Station
Arriving at Sydney’s Central Station

After checking in and getting settled in our small (but clean and cozy) room, we headed out to make the most of the remaining daylight. It wasn’t even 3pm yet, but the sun was going to set before 5. Kaitlyn’s mentioned this before, but I always find it odd when it’s a warm or hot day, and the sun sets early. Growing up in Vancouver, I’m conditioned to expect 9pm sunsets when it’s this warm.

Central Station Hotel
Our cozy room. $95 CAD/night

From the hotel, we made our way first to Hyde Park. The park is named after the original Hyde Park in London, but it’s less than 1/10 the size. None the less, there’s a beautiful tree lined path that runs down the centre of the park, and a well kept fountain at one end. From the fountain, you also have a great view of St. Mary’s Cathedral, one of the many beautiful older buildings in Sydney. Sydney was founded about 100 years before Vancouver, and it really shows in some of the fantastic old buildings.

Hyde Park
Hyde Park
Ibises are everywhere
An ibis infront of the fountain at Hyde Park
St.Mary's Cathedral
St.Mary’s Cathedral

From Hyde Park, it was a straight shot down Macquarie St towards the Sydney Opera House. When you think of the most famous landmarks in the world, I think the Sydney Opera House is definitely in the top 20, if not the top 10. I was really excited for Kaitlyn to see it for the first time.

The building itself is a marvel of engineering and design, and I was awed even though this wasn’t my first time seeing it. It seems a shame if I were a local here and grew to take the building for granted (and it makes me wonder if visitors to Vancouver feel the same way about Vancourites taking our natural beauty for granted).

While the building itself was spectacular, the experience of trying to get a good photo of it (and more importantly to Kait, a photo with us in it) was not so great. There is an art to selecting a stranger to ask to take a photo for you. Normally at a landmark, it’s not too difficult to pick a person who is likely to take a decent photo. My general rule of thumb is to find a person using a camera worth more then every piece of clothing and accessory they are wearing. If they are with a partner or in a group, take everyone’s clothing and accessories into account. I think the higher the ratio between Camera Value vs Clothing Value, the higher the probability the person can take a decent photo. Unfortunately for us, we didn’t have much luck getting a great photo in front of the Opera House. I shouldn’t complain though. Our friend Chris recently came to Sydney and his photo in front of the Opera House didn’t even really have the Opera House in the frame.

She squatted while taking this picture
Knew it wasn’t going to be a good picture when she squatted to take the picture 
Opera House details
Opera House details
Circular Quay and CBD
Sydney Harbour Bridge

After the Opera House, we walked along the water past Circular Quay to The Rocks (not The Rock, or The Rock, or The Rock, but The Rocks). The Rocks is a historic area of Sydney adjacent to the Central Business District. It’s a great place to stroll around with lots of food and culture to explore. We made our way through it quickly though, as we were hoping to walk to Darling Harbour before the sunset.

Ferries at the Circular Quay
The Rocks
The Rocks

Lots of areas around Sydney are being set up for Vivid Sydney, a “Festival of Light, Music, & Ideas”. I don’t really know what it’s all about, but it starts on the 27th so Kait and I will be able to check out the opening night of the festival before we leave for New Zealand on the 28th.

There were different light exhibits being set up all around the CBD and Circular Quay for Vivid
There were different light exhibits being set up all around the Rocks and Circular Quay for Vivid
Sydney Town Hall
Sydney Town Hall

At this point, we were starting to get hungry, and weren’t really impressed with our food options around Darling Harbour… They looked good, but a bit too pricey (e.g. 21.50 AUD for Chicken Schwarma with Rice). With that in mind, we decided we’d do a quick loop around Darling Harbour (and over Pyrmont Bridge), before making our way to Chinatown to find some food.

Darling Harbour at 5:00pm

After strolling around Chinatown for a while, we settled on eating at Dixon House Food Court. Kait got fried noodles and I had a spicy noodle soup. The highlight of the noodle soup were the noodles themselves. They were thin, al dente, made in house, and they gave you a free refill of noodles with every order of noodle soup! I’m usually not big on kaedama (or gluttony in general), but it’s also tough for me to pass up a free offer in order to maximize my value. That sort of tells you a lot about my personality.

Dixon St. in Chinatown
Dixon House Food Court. It was a lot busier down here than in the restaurants upstairs.
Kaitlyn's noodles for $9.80 AUD
Kaitlyn’s noodles for $9.80 AUD
Super spicy beef noodle ($12 AUD)
Super spicy beef noodle ($12 AUD) after a few bites

After dinner, we slowly made our way back to the hotel. We made a pit stop at Coles (our favourite supermarket in Australia apparently) to pick up some drinks and fruit. When we got back to the hotel, it was only 7:30! So early in the day, but perfect timing for Masterchef Australia. We hadn’t watched in almost a week, but I was happy to see that my favourite contestant (Sad Joey Fatone) was still in it.

We’ve got 2 more full days in Sydney, so we’re spending the evening making some plans (while watching Masterchef and Bachelorette).

Steps: 21,000

Spending Summary: Japan

In what feels like ages ago even though it was only a little over a month, Kaitlyn and I spent 28 days in Japan. After spending time in Taiwan and Korea, we were expecting to spend more in Japan. As with the other spending summary posts, hopefully this can help you get an estimate of how much you might spend in Japan on your own travels. Let’s see how things worked out.

Over the course of 28 days (and 27 nights), we spent a total of $5,712.93, which works out to be $204/day. As with the other spending summary posts, all dollar amounts are in Canadian Dollars. This was more than we spent in Korea, and around double the cost of our travels in Taiwan. Here’s the breakdown:

  • Accommodations: $1,535.83
  • Food: $1,729.50
  • Transportation: 1,969.13
  • Activities: $470.47
  • Souvenirs: $7.99

And here’s how things compared with Taiwan and Korea.

Japan Spending

Accommodations

We stayed at a variety of places in Japan, but they were all pretty “conventional” when you take into consideration some of the quirkier places you could spend a night in Japan. Of the 27 nights we spent in Japan, 7 of those nights were complimentary thanks to my great-aunt “hosting” us in Osaka. The remaining nights were spent in various hotels and an AirBnB in Tokyo. Looking only at the accommodations we paid for, our average cost per night in Japan was $76.79. This was actually less than I expected it to be, but a lot of that has to do with finding a very reasonably priced AirBnB in Tokyo, which is the most expensive city in Japan. Overall, I was quite happy with the final cost as we still kept things below what our rent would be in Vancouver (~$60/night).

Food

Food prices vary widely in Japan, but nothing ever feels unreasonably priced. You get what you pay for in Japan, and that price range can be big. However, especially when you take into consideration the prices, it’s hard to have a bad meal in Japan. Even the cheapest eats are likely to leave you satisfied and pleased with its quality.

The cost of food was quite close to Korea, with Kait and I spending $61.77/day. The higher spending in Japan can be attributed to more “splurge meals” than we had in Korea. The food in Japan was more in line with our tastes, so we found more opportunities to go for an more expensive meals (i.e. $20+/person lunches or $50+/person dinners). I would say anywhere from $20-40 / person / day is a very reasonable budget estimate for food in Japan.

Transportation

Transportation was where the biggest increase in spending was compared to Taiwan and Korea. Moving from city to city in Japan can be expensive, and while not unreasonable, transportation within cities can also quickly add up.

The bulk of our transportation costs came from just 2 things: domestic flights and trains. Both of these modes of transportation can be expensive, but there are many options to reduce your costs if you do your research. For trains, Kait and I purchased 14 day JR Rail Passes which cost $558 each. Rail passes can be good value, but you need to compare the cost of a rail pass with your planned itinerary to make sure you’re saving money with the rail pass. Also, don’t feel limited to JR Rail Passes. There are other (less expensive) options out there, especially if you’re only planning to travel around a certain area, and not all over Japan. For flights, we booked 2 domestic flights where each flight segment cost $130. Both JAL and ANA have promotional flight pricing at around 10,000JPY / segment for foreign travellers with international tickets in and out of Japan. This makes air travel very competitive with train travel as long as the places you’re travelling to are covered by direct flights from either airline.

Other than those two major transportation expenditures, all the remaining spending mostly came from travel within cities on subways, and the occasional bus our train rides. Budgeting $10-$20/day/person for transportation within cities in Japan would be a good place to start, moving up and down the range depending on how much you want to walk, and how often you opt for taxis instead of taking transit.

Activities

Activity spending is really dependent on the traveller with regards to how much you need to budget. Kait and I spent an average of $16.80/day on activities, but in reality, we didn’t even spend money on “activities” for most of the days (17 out of 28 days to be exact). Most days Kait and I are happy to just walk around a city, which is free. Here are some spending highlights:

  • Most Expensive: $183.66 for the Tokyo DisneySea
  • Most fun bang for your buck: $24 baseball tickets
  • Best Japanese Experience: $27.12 Onsen admission
  • Most recommended: $7.20 Okinawa Prefectural Peace Memorial Museum

So, that’s it for the Japanese Spending Summary. Next up on our travel itinerary is Australia and New Zealand. I’m expecting these two countries to be the most expensive, but we’ll see how they stack up compared to Japan.

(Originally Published June 7, 2016)

Is it Worth Buying a JR Pass?

JR PassFor anyone travelling to Japan with the intention of seeing more than one city, buying a Rail Pass of some sort is an important consideration to make. While there are a lot of train companies in Japan (with a lot of different rail passes), the one most people are likely familiar with is the JR Pass from the Japan Railways Group.

When buying a JR Pass, you have to decide if you want an ordinary pass, or a “First Class” pass which gives you access to nicer train cars. I find regular cars on JR Trains comfortable enough, so the only real consideration is the duration of the pass.

  • 7-Day: ¥29,110
  • 14-Day: ¥46,390
  • 21-Day: ¥59,350

So is it worth it to buy a JR Pass, or would you be better off just buying train tickets as you go? You’ll need to do a bit of research before you make a decision on whether to buy a pass or not. Here are my suggestions to help you make your decision.

  • Map out the “big segments” of your trip that you know you will be making (e.g. Tokyo to Osaka, Osaka to Kyoto, Kyoto to Tokyo, etc). Don’t worry about all the shorter segments you might use the JR Pass for.
  • Price out those segments using JR websites (or Google Maps does a pretty good job of showing fares when you use it for transit directions).
  • Look at your dates to determine what duration Rail Pass you would need.

After making that comparison, if the JR Pass is cheaper than buying the tickets individually, then I say go for it. Not only are you saving money on the cost of buying tickets individually, but you get other added benefits of having the JR Pass.

You might be open to going to different places (accessible via your pass) rather than just staying in your intended cities. Having the pass gives you options to see things you might not of wanted to spend money to see, but knowing it requires no additional cost, makes you open to checking it out.

You can use your pass within cities you are visiting, since JR runs intracity rail systems in some of the bigger cities (e.g. Osaka and Tokyo). I wouldn’t bother trying to price out these intracity trips when determining whether the JR Pass is worth it or not, but it’s nice to know you’ll be able to get some more value out of the pass.

So, how did the JR Pass work out for me and Kait? We bought a 14-Day Ordinary JR Pass which cost $558 CAD each. I’ll do the price comparison with the JPY cost of the JR Pass (46,390JPY) since that’s what the individual train tickets would have been purchased with, and depending on what country you buy your JR Pass from, you’ll be paying approximately the JPY cost plus a small currency exchange premium (dependent on who you buy the JR Pass from).

Here is a list of all the train (and boat) rides we took using our JR Pass:

  • Hakata to Beppu: ¥5560
  • Beppu to Hakata: ¥5560
  • Hakata to Hiroshima: ¥8940
  • Hiroshima to Miyajimaguchi: ¥410
  • Myajimaguchi to Miyajima: ¥180
  • Miyajima to Miyajimaguchi: ¥180
  • Miyajimaguchi to Hiroshima: ¥410
  • Hiroshima to Shin-Osaka: ¥10230
  • Osaka to Kyoto: ¥560
  • Kyoto to Saga-Arashiyama: ¥240
  • Saga-Arashiyama to Kyoto: ¥240
  • Kyoto to Inari: ¥140
  • Kyoto to Osaka: ¥1210
  • Tennoji to Nara: ¥470
  • Nara to Tennoji: ¥470
  • Osaka to Sannomiya: ¥410
  • Sannomiya to Osaka: ¥410
  • Osaka to Namba (Via Imamiya): ¥190
  • Shin-Osaka to Tokyo: ¥14140
  • Tokyo to Shinjuku: ¥200
  • Shinjuku to Akihabara: ¥170
  • Akihabara to Tokyo: ¥140
  • Shimbashi to Shinjuku: ¥200
  • Shinjuku to Shibuya: ¥160
  • Shibuya to Ebisu: ¥140
  • Ebisu to Shinjuku: ¥160
  • Shinjuku to Maihama: ¥390
  • Maihama to Shinjuku: ¥390
  • Shinjuku to Ueno: ¥200
  • Ueno to Shinagawa: ¥200
  • Shinagawa to Shinjuku: ¥170

Total: ¥52,470

Overall, I’m satisfied with the value we got out of our JR Pass. When we made rough plans for the trains we’d take in Japan, we included several longer distance day trips out of big cities that we ended up not going on, but we still came out ahead ¥6080 per person. That’s why I suggest only including the main segments of your trip when deciding on the JR Pass. Plans can change and you don’t want to feel like you have to go out of your way to use your JR Pass in order to make sure it was better value than buying individual train tickets.

If you’re the kind of person looking to maximize value, and are willing to plan your trip around maximizing the value of your JR Pass, then I think you can come out way ahead of the cost of buying individual train tickets.

While rail passes can offer good value, train travel in general in Japan is not exactly cheap (e.g. Tokyo to Osaka round trip on the Shinkansen is $320 CAD). Depending on your itinerary, it might actually be cheaper to fly between cities than to take the train. Kait has mentioned before the discount airline tickets you can buy as a foreign visitor in Japan, and that might be a better option for you if a Rail Pass isn’t a good fit.

With the lack of great train travel options in North America, I get this romantic notion about trains whenever I travel to places with good train systems. In that sense, there are some intangible values to getting a train pass that I can’t put a dollar amount to. Overall, Kait and I were both really happy with our JR Pass experience, riding trains for over 2000km around Kyushu and Honshu.

(I await the day we have high speed rail down the west coast from Vancouver to San Diego)

How I Track Our Spending: Spreadsheets

As you can infer from my posts about our spending, in order to analyze your spending, you have to first keep track of it. In this post, I’m going to go over briefly how we keep track of our spending, and then share and go over an Excel Spreadsheet you can use if you don’t already have a method for tracking your spending.

I’ll say upfront that I don’t actually think it’s important what you use to track your spending, just that it’s important to do so. Get your bank to print out your passbook (do they still do that?), use pen and paper, use a digital notepad, use a spreadsheet, put everything on your debit/credit card and review the statements, use specialized software, or use some web service… It doesn’t really matter what you use, just that you do it. Why track your spending? Because what we spend our money on is a reflection of our values, so if you want to make sure your spending aligns with your desired values, you have to track your spending. (What your inflows and outflows of money are also helps you reflect on your Money vs Life balance).

What I Use (Normally)

In what is already starting to feel like a past life, I use Microsoft Money to track my spending (as well as my investments, and basically anything related to my personal finances). If you’re not familiar with Microsoft Money, it’s sort of like Quicken, except it doesn’t suck (that’s my personal opinion).

Unfortunately, Microsoft discontinued the software back in 2009, so Microsoft Money is no longer actively developed. When they stopped developing it, I searched all over for an alternative (including purchasing and using Quicken for a while *blurgh*) but in the end, I just kept on using Microsoft Money. The good thing about Microsoft Money though, is that since Microsoft stopped working on it, they’ve made it freely available! This is great, but at the same time, it’s hard for me to recommend anyone start using it as I’m sure at some point, it will stop working on the newest version of windows. (And when that day comes, I’ll either cling on and run it in a VM forever, or go back to my desperate and unfruitful search for an alternative I like).

What I Use During Travel

When I’m travelling, I continue to use Microsoft Money to track everything, but I supplement it with additional tools. There are a few reasons for this:

  • I like to keep track of spending real time when I travel. Since not every transaction will have a receipt, if I don’t keep track of it during the day, it’s easy to forget some details when I’m trying to log everything in the evening.
  • I like to keep track in two ways to make sure everything balances and I have an accurate record of the current (foreign) cash I have on hand.
  • Travel often includes a lot of shared expenses, so it’s a lot easier to share a separate document used for tracking spending than it would be to share my Microsoft Money data.

So, my basic workflow to track spending when I travel involves taking notes on the go (historically with a pen and notepad, but nowadays with Evernote, see the header image for this post), then transcribing things into a spreadsheet at the end of every day. Sometimes, (if mobile data is readily available) I’ll enter data directly into an Excel Spreadsheet from my phone. I keep my spending spreadsheet in Microsoft OneDrive, and Microsoft Excel for Android (and iOS) do a decent enough job for me to enter transactions on the fly, but their offline modes can be finicky, so I usually only do this when I have reliable mobile data.

I tend to (stupidly) build a new tracking spreadsheet from scratch for every trip, but this allows me to customize the spreadsheet as needed, and make tweaks to it based on things I didn’t like the last time around. Examples of things I’ll change up are whether I track the country/city for every transaction (not necessary for trips to a single location), and whether it’s a group trip and I need to track who paid for what and for whom (I use Splitwise for this now, which I’ll write about in the future).

Regardless, the fundamentals of a spreadsheet to track spending are generally the same, so I present to you a basic version for travel that you can download. The rest of this post will be describing the spreadsheet and how you can use it.

Travel-Spending.xlsx

This workbook has 5 worksheets in it:

  • Transactions
  • Summary
  • Cash
  • Currencies
  • Payment Accounts

The first worksheet, Transactions, is where all the spending gets entered. Each row represents a transaction, and the values you enter for each column should be pretty self-explanatory. The spreadsheet is filled with some dummy (or not so dummy) data so you can see how everything works.

Transactions
Transactions worksheet

Column D (“CAD”) should be auto-filled using the formula given. This takes the amount in Column B, along with the currency in Column C, and calculates the total value in Canadian Dollars. The Currency Names (e.g. JPY, TWD, etc) are given in the “Currencies” worksheet.

Payment Account records what was used to make payment for the given transaction. The available options must come from the list given in the “Payment Accounts” worksheet.

Summary
Summary Worksheet with the Categories listed

Category allows you to categorize your transactions. These categories come from the list (which you can customize) in the “Summary” worksheet. The categories behave in a straightforward manner except for “Transfers”. Transfers do not get included in the spending totals, because Transfers are used for moving money from one payment account to another. An example of this would be loading credit onto a transit card. This is a transfer as the money hasn’t actually been spent, just added to another account. When you use the transit card to pay a transit fare (or to buy a delicious pudding from 7-Eleven), that’s when the money is actually spent.

The “Cash” worksheet is where you can see this in action. Anytime there is a “Transfer” transaction recorded, the spreadsheet looks at the Payee column along with the Payment Account column to determine where the transfer is coming from and going to. For example, a Transfer transaction with a Payee of “EasyCard” and a “Payment Account” of Cash deducts from the cash total, and adds it to the “Loaded” column for “EasyCard”. When “EasyCard” is used as a Payment Account for another transaction, then that spending gets added to the Spent column for the “EasyCard”. This allows you to keep track of your running balance on transit cards (or any other account for that matter). If you find this a little bit confusing, try filtering the Transactions worksheet to only show transactions with Category = “Transfers”, and play around with the numbers. See how the values in the “Cash” worksheet change.

The last thing I’ll note is that with this spreadsheet, I’m using a fixed exchange rate for all the currencies. The reason for this is because I usually convert all the cash I’ll need in one go, therefore I only use one fixed exchange rate. Any transactions I put through a credit card go in as CAD, and I’ll simple wait for the charge to post on my credit card before I know the final cost. I’ll usually add a note in the Notes column for that transaction with regards to how much it was in its original currency.

So that’s about it. I usually get a lot of insight looking at the “Summary” worksheet, and I can use the data from the transactions worksheet to analyse my spending in all sorts of ways (e.g. daily spending average vs remaining cash divided by remaining days). (Not included in this sample spreadsheet, because I thought it was too crude and didn’t want to spend time to clean it up, is a worksheet I have that gives me a summary of spending for each day of the trip).

While this spreadsheet has aspects of it that are specific to travelling, it can definitely be used as a foundation for tracking day to day spending as well.

Does anyone else out there keep track of all their spending? What methods do you use, and do you change it up when you’re travelling?

Tracking Steps: Google Fit vs Moves

If you’ve been keeping up with Kaitlyn’s Travel Log, you’ll know that she’s been reporting our step count each day. Before we started our trip, I wanted to keep track of our steps throughout our travels. I liked some of the ideas of the Quantified self and figured our step count would be an interesting thing to measure. (I also thought it could be a good angle for our travel blog). Over Christmas and Boxing Day, I kept my eye out for good deals on fitness trackers but I couldn’t find any good sales. I then turned my eye towards fitness tracking apps for my phone.

Here were my requirements (in order of priority):

  1. Not kill my battery life
  2. Track daily steps
  3. Provide export options
  4. Track our locations and display it on a map

After doing some research, I narrowed my list down to two apps:

  • Google Fit
  • Moves

Google Fit

Google Fit is Google’s “Fitness Platform” for Android, with the idea that it provides a single place for you to track all your fitness needs. It can be paired up with activity tracking devices (like FitBits), but more importantly for me, it can make use of your phone to perform the activity tracking. Being a Google made app, it makes use of the activity tracking co-processors that are found in some phones now, which should help preserve battery life.

Main screen shows your activity for the day... 0 steps, because my phone has been idle all morning as I worked on this post.
Main screen shows your activity for the day… 0 steps, because my phone has been idle all morning as I worked on this post.
Scroll down and you see the total steps by day (or by week or month). Select a day and it breaks down the activities by session.
Clicking into one of the active sessions shows info about that session, along with a map of the route.

Moves

I tried the Moves App when it first came out on my old Nexus S. It provided activity tracking and also mapped out the locations of those activities. I thought of it like an automated spatial journal. It made it easy for me to look back and remember where I was at any given time. The big problem for me back then though, was that it killed my battery life. I couldn’t get through a day without my phone needing a charge, so I had to uninstall it.

Fast forward to today, and now the Moves app is owned by Facebook. It also makes use of motion co-processors in phones, so it shouldn’t kill the battery. The only other big change I see in the app now is that it has also developed itself into a platform of sorts, and there are numerous companion apps that can make use of the data that Moves is tracking.

Main screen shows your activity for the day, along with a timeline of sorts. Swiping left or right changes the day.
The timeline shows places you went, along with the way you moved from point A to point B.
Selecting a place or a segment of transit opens a map showing the route of the activity or the location of the place you were at. You can trace your steps in the map view going from place to place.

Google Fit vs Moves

Okay, so the main point of this article isn’t to review the apps, but to see how well they’ve been tracking our steps. I wanted to see if their step counts were comparable (i.e. “do the two methods of measurement agree sufficiently closely?”, Altman and Bland) and how best we should be logging and reporting our steps. (So far, we’ve been reporting the average between the two step counts, rounded to the nearest 100 or so).

We’re about 50 days into our trip, and other than a couple days where one app or the other failed (i.e. the background process running on the phone crashed and didn’t restart), both apps have been running smoothly. We have 46 days worth of step counts where both apps were running, and that’s the data I’ll be using.

First, I did a scatter plot with one point for each day. Google Fit on the x-axis and Moves on the y-axis. If their step counts are close, I should expect the points to follow a 45 degree line closely (i.e. x and y values should be very close in value).

Fit vs Moves

So far so good. For the most part, it seems like both apps are doing a reasonable job matching each other step for step, including higher step count days. In order to check this more clearly, I created a second plot. This plot compares the difference in step count vs the average step count for each day. If both apps measure step counts very closely, all the points should fall close to the x-axis. If the difference in step count grows as the total step count increases, then I would expect the plot to deviate from the x-axis as we go further to the right in the plot. Either way, what I’m hoping to see here is no clear pattern with how the difference between the two step counts deviate, regardless of how many steps were taken that day.

Difference vs Average

Okay, so the difference that we’re looking at here is the Google Fit count subtracted by the Moves count. While things are clustered around the x-axis (i.e. zero difference), it’s a bit more spread out than I would have hoped. The good thing here though, is that there doesn’t appear to be any clear pattern of the difference increasing with the higher step count days. (In fact, the highest couple step count days show very close counts).

Visually inspecting those two graphs, I’m fairly confident the two apps are measuring our step counts in a similar way, and one isn’t way off from the other. With that in mind, what’s the best way for us to report our step counts? We could probably just use one app (and save some battery on my phone), but since I have nothing to determine the accuracy of the step counts, and only know the two are relatively precise, I think my best bet is to continue reporting the average between the two (similar to some of the ideas from “The Wisdom of Crowds” by James Surowiecki, though I guess there is a certain expectation of accuracy for the two counts for this to really help).

With that in mind, I also looked at the standard deviation of the difference in step count… 1185 steps (or about 5% of our average steps per day). Based on that, we’ll continue to use our average step count when reporting our daily steps, but I think we’ll start rounding to the nearest thousand.


Step Summary

If by chance you’ve gotten this far in my post, here’s some extra step related notes on our trip so far (as of April 18).

Total steps: 983,000
What!? We’ll probably hit a million steps today or tomorrow. Not sure how many days it’d take me to walk a million steps back in Vancouver, but I’m pretty sure it’d take more than 50 days. It was pretty exciting for me to see this number, as I have a lot of respect for how big a number one million is.

Average steps per day: 20,000
I’m quite happy about this. We set 20,000 steps per day as our goal, and while we haven’t hit it every day, the fact that our average steps per day is right on target is pretty awesome. It means our higher step days are nicely balancing our lazier days.

Most steps in a day: 44,548
This came pretty early on our trip on Day 4, when we got up early to hike Elephant Mountain in Taipei.

Fewest steps in a day: 10,027
Similar to our average steps per day, I’m quite happy about our fewest steps in a day. 10,000 steps per day (rightly or wrongly) is often given as the recommended number of daily steps for healthy living, so knowing that even our most inactive days reaches this threshold is a good indicator that we’re living a more active lifestyle now than we were before.

I was tempted to hold off on posting this since we’re so close to a million steps, but I figure I may a well post it, and Kaitlyn can say something about reaching a million steps when we actually hit it.

Spending Summary: Korea

Kait and I spent 6 nights in Seoul, and while it’s a much smaller sample compared to the 30 days we spent in Taiwan, hopefully a review of our spending will still be useful to people.

First, the total up front. Over 7 days and 6 nights in Seoul, we spent  $1,095.88 CAD (Everything will be in CAD unless otherwise noted). This works out to $156.55/day. Here’s the breakdown:

  • Accommodations: $577.98
  • Food: $340.48
  • Transportation: $68.05
  • Activities: $107.47
  • Souvenirs: $1.90

Of note, we also spent $181.83 “Shopping” which includes gifts and everyday things for ourselves which I wouldn’t categorize as travel related (unlike souvenirs, which I think of as travel related keepsakes).

For comparison, here’s a table of spending by country. Numbers in brackets are per day averages.

Spending Taiwan, Korea

Accommodations

Nothing too interesting here. We spent our entire stay in Korea at the same hotel in Seoul. We paid $577.98 for 6 nights which worked out to $96.33/night. (The reason the per day average is different is because I averaged the cost of accommodations over our total days). This was a discounted rate because we booked our flight to Korea on Expedia and they give you an opportunity to book hotels at a discount at your destination. (And not a fake discount. We did a lot of comparing the discount rate vs non-discounted rates on a variety of sites including Expedia itself).  I was expecting the per night cost to be higher in Korean compared to Taiwan, but I was happy we found a good hotel with a great location for less than $100/night.

Food

Food in Korea, both in restaurants and on the street, appear to be more expensive than comparable food in Taiwan. I would estimate things were +25% more anecdotally. The bigger jump in our per day spending came from the fact that we had a longer list of things we wanted to try in Korea, so we ate at pricier places more frequently due to our shorter stay.

Transportation

We had no intercity travel at all since we stayed in Seoul the whole time. However, if you consider Incheon Airport outside of Seoul, we spent 10,000 KRW ($11.32) on an Airport Bus into the city and 6,900 KRW ($7.81) on an Airport Express Train back to the airport per person. The Airport Express Train was by far more comfortable, cheaper, and more convenient (assuming you can get to Seoul Station without too much difficulty). The rest of our transportation costs came from taking the Seoul Subway. Most rides (under 10km I think) were 1250 KRW ($1.41).

Taiwan’s total for transportation was higher primarily because we did a lot of travelling between cities in Taiwan. Comparing the intracity travel costs, Taiwan was significantly cheaper that Korea (or really, just Seoul). Lots of rides on the Taipei Metro were only 16 TWD, or $0.64 compared to Seoul’s $1.41.

Activities

There were only two activities that we spent money on in Korea, and over 90% of it was spent on our DMZ tour. The other activity was the entrance fee to Gyeongbokgung Palace. The rest of our time was spent walking around exploring neighbourhoods… and shopping.

Souvenirs

As mentioned in the Taiwan Spending post, we tend not to spend too much on Souvenirs. For Korea though, I set aside some coins as keepsakes since I collect coins and I’ve never been to Korea before. 50 and 10KRW coins are difficult to come by (basically nickels and pennies). Your best bet would be when there are percentage based sales (e.g. 30% off) or in my case, our hotel happened to have coins for me to exchange with them.


Overall, our spending in Korea was pretty much in line with my expectations, and even the amount spent on gifts and personal shopping were quite reasonable. We’re in Japan now, and while I originally thought Japan would be more expensive than Korea, I have a feeling our spending average will be close (or even less). We’ll see how it goes. We’ll be in Japan for just under 30 days, and we’ll be travelling throughout, so we should get a pretty good idea of average spending across Japan.

Anyone have experience travelling around Japan and Korea? What were your experiences with cost comparisons?